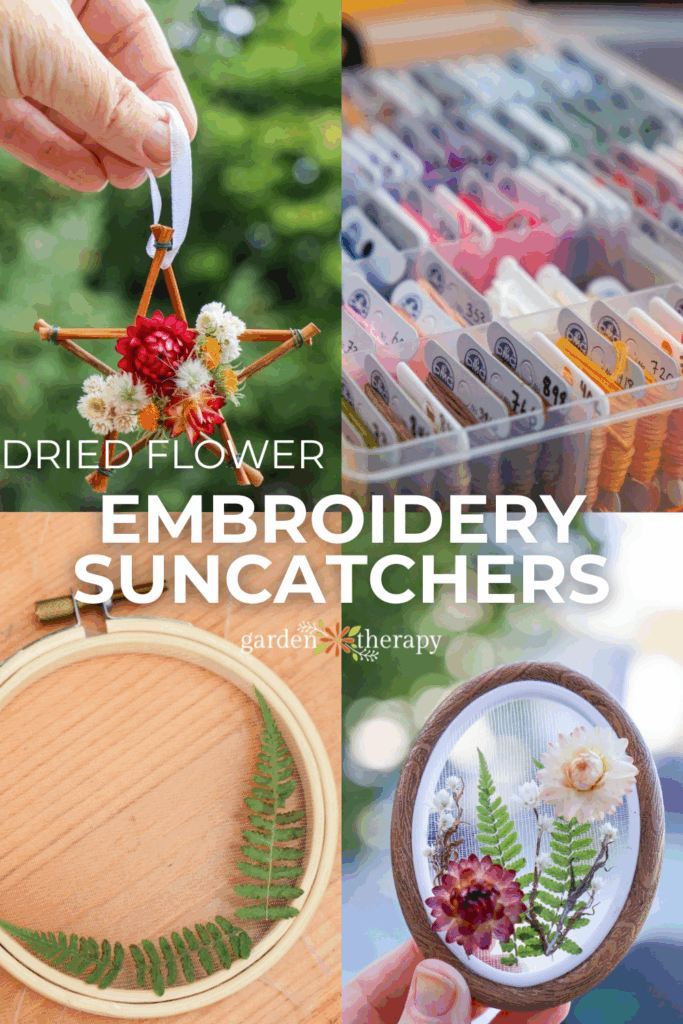
Dried flower embroidery allows you to preserve the beauty of your garden while also adding your own spin with hand stitches. This is just one of the many gorgeous dried flower art ideas you can do using an embroidery hoop. Let me show you how!
As a serial hobbyist and crafter, I love it when two worlds can combine. I’ve been spending the past two summers focusing on my dried flower garden, growing and testing out new flowers, specifically with the intention of drying them.
So you can imagine, I have quite the stash.
But during the winter, you can find me nestled up watching some TV while embroidering my latest project. My embroidery stash is another pride and joy.
Everyone in my life has both dried flowers and embroidery from me at this point. So, it was only natural that I combined the two into these beautiful, dried flower embroidery pieces. It may just become my next obsession this winter.
Here’s how you can make your own stunning dried flower art.
Dried Flowers for Art
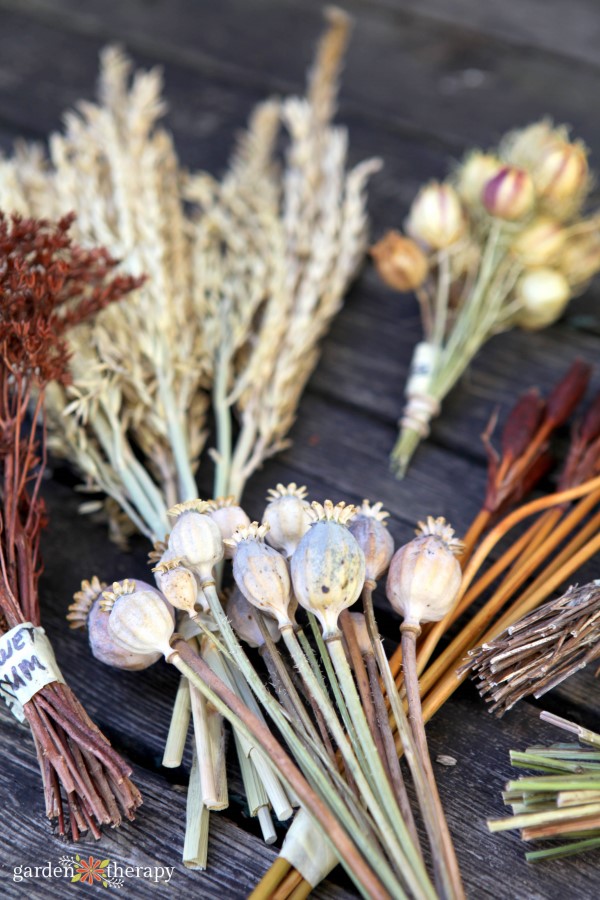
Some flowers dry better than others. Test out which flowers in your garden hold their colour and structure. Since these are often small art pieces, I like to use smaller flowers or branching flowers that can break down into smaller bits.
Here are some of my favourite dried flowers to use in a dried flower hoop:
Other Materials to Include
You can also use pressed flowers for your embroidery, but just note that they will be extra delicate to work with. I like to apply them first, as they work best as a background. The 3D flowers on top give the piece depth.
Don’t be scared to explore and incorporate all kinds of natural materials. Here are some things you could forage for:
- Lichen and moss
- Pinecones
- Twigs
- Acorns
- Flaxseed heads
- Oat grass
- Pressed leaves
- Feathers
Dried Flower Embroidery Art Tutorial
How many flowers you use and how long it will take you to complete your dried flower embroidery depends entirely on the size of the embroidery hoop you use. I recommend starting with a smaller-sized hoop and working your way up to larger pieces.
Materials
Make It!
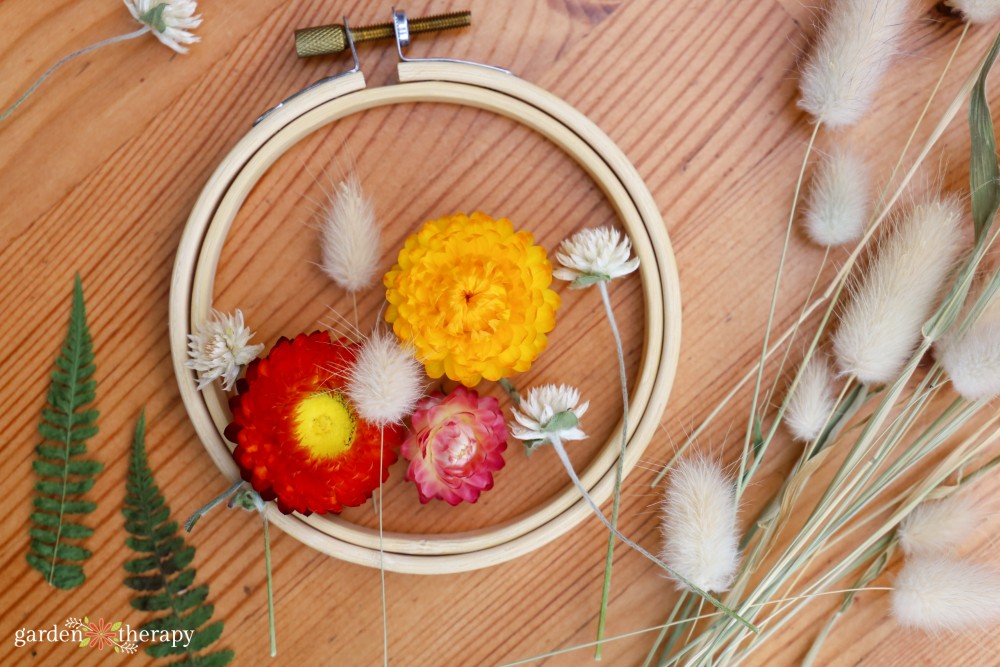
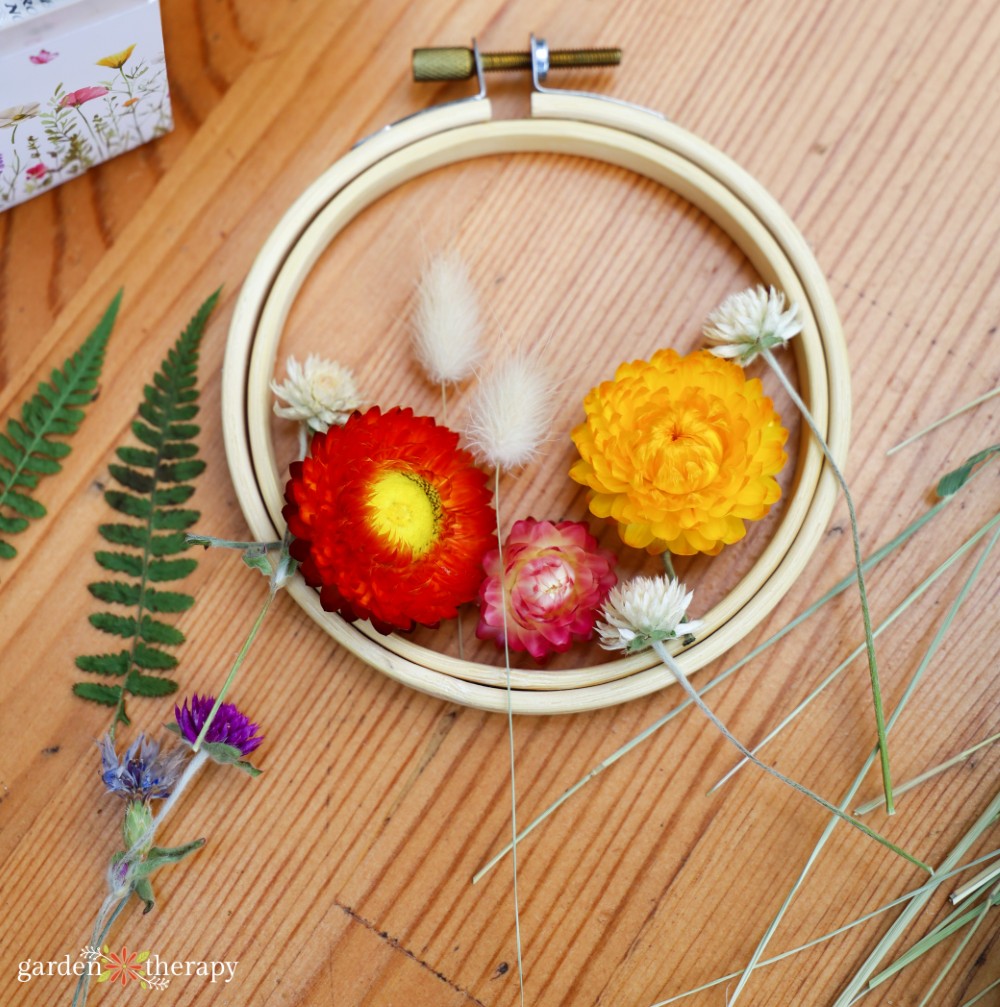
Use your flowers and your empty hoop to figure out your general design ahead of time so you know how to properly layer the flowers. Take a picture so you remember your design and can reference it while creating.
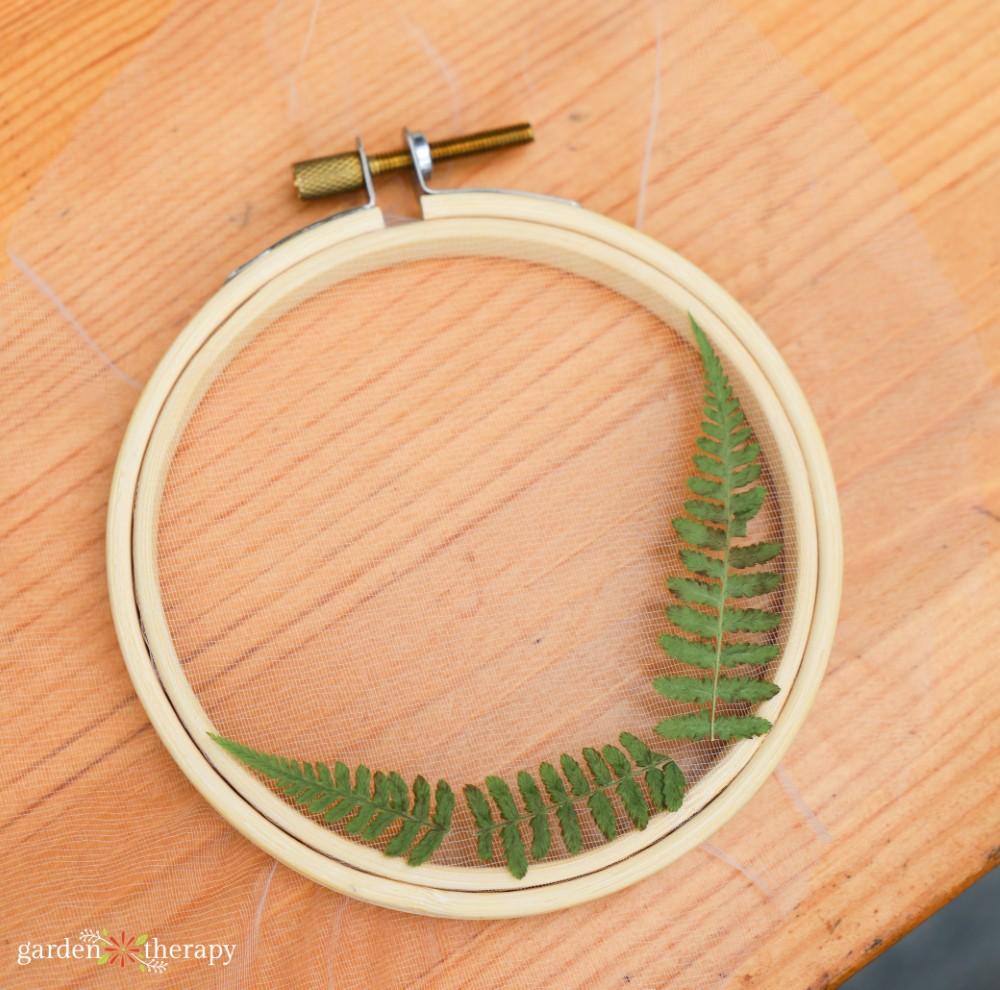
Prepare your embroidery hoop by cutting a piece of tulle and placing it between the wooden hoops. Stretch it tight, but not so tight that the tulle looks warped. It should be taut.
Pro Tip: You can also try using chicken wire instead of tulle. This creates less of a delicate look and more of a rustic look, where you weave the stems in as opposed to sewing them. This works great for bigger pieces.
To secure your flowers in place, you have a few options:
- Embroidery. Using thread, this creates the most delicate look. It also takes some patience and handiwork to accomplish.
- Weaving. If your flower has an intact stem and isn’t too thick, you can weave it through the tulle. While the easiest way to do dried flower embroidery, it isn’t as secure as the other methods.
- Hot glue. This can be a little messy, and won’t work for the smaller flowers, but it is great for securing larger flowers in place without stems.
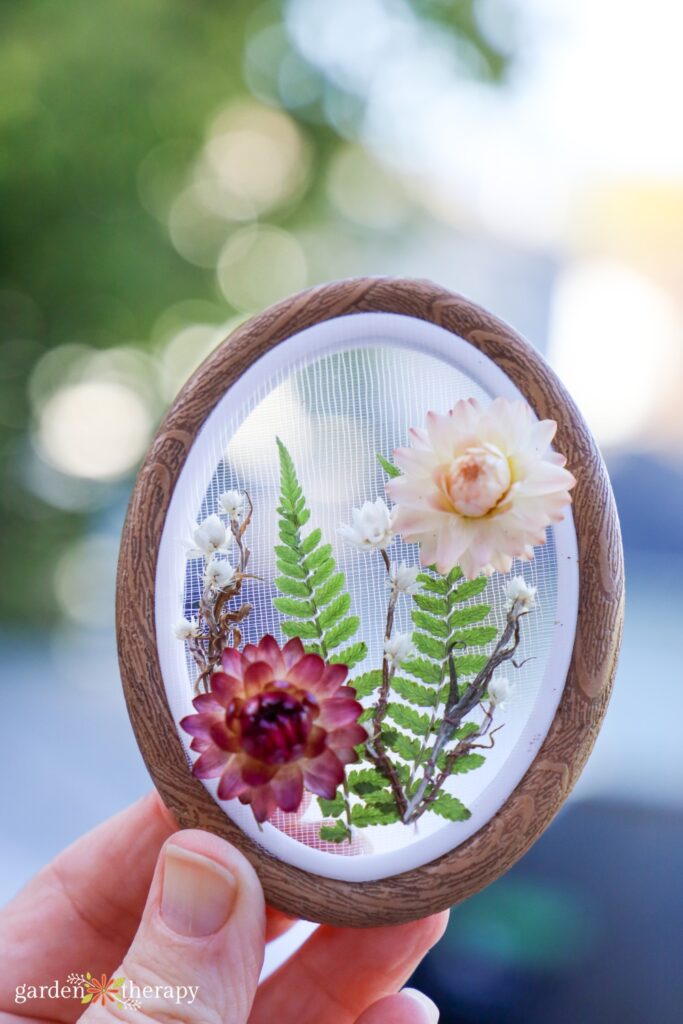
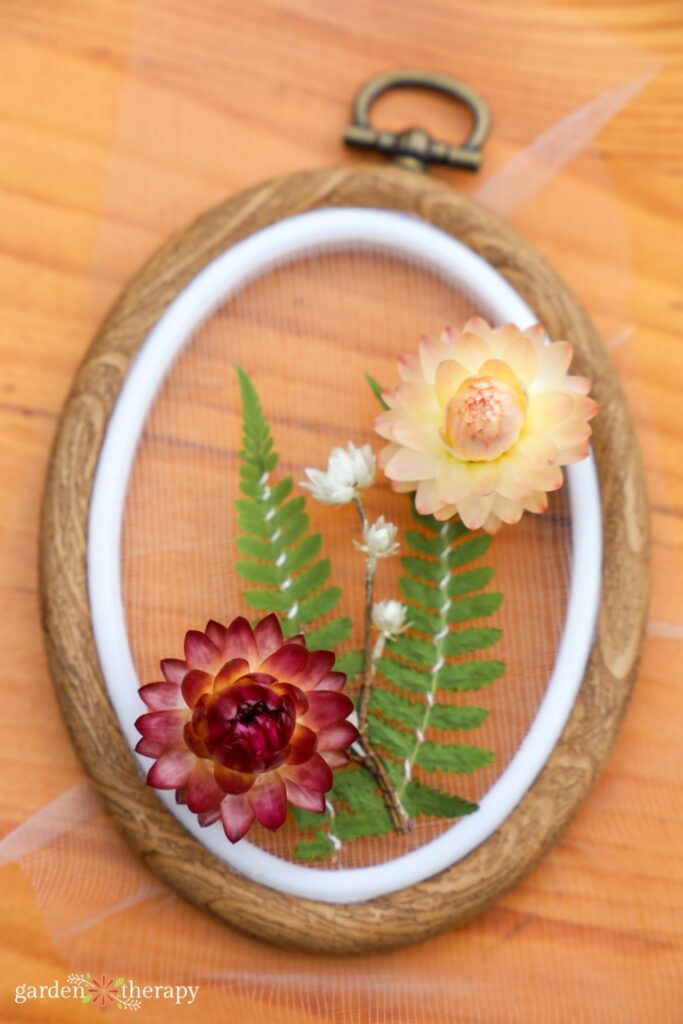
Start by adding your flatter, background pieces. For this piece, I used pressed ferns as the background. I used a simple stitch along the main vein to secure the fern in place.
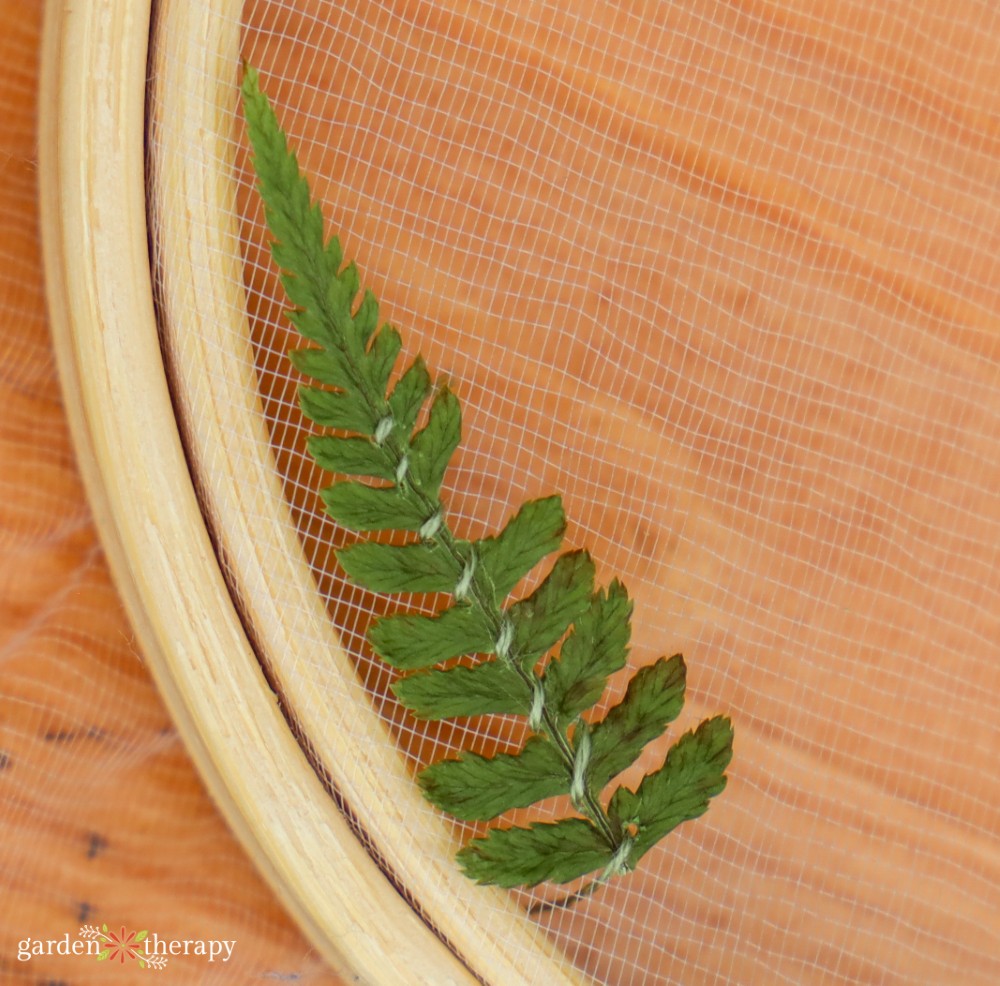
Pro tip: Since we’re working with tulle, you have to keep your stitches fairly clean at the back, as they might be seen. I like to start my knot somewhere behind a flower where it won’t be seen. Start a new thread for each flower so there are no jumping stitches.
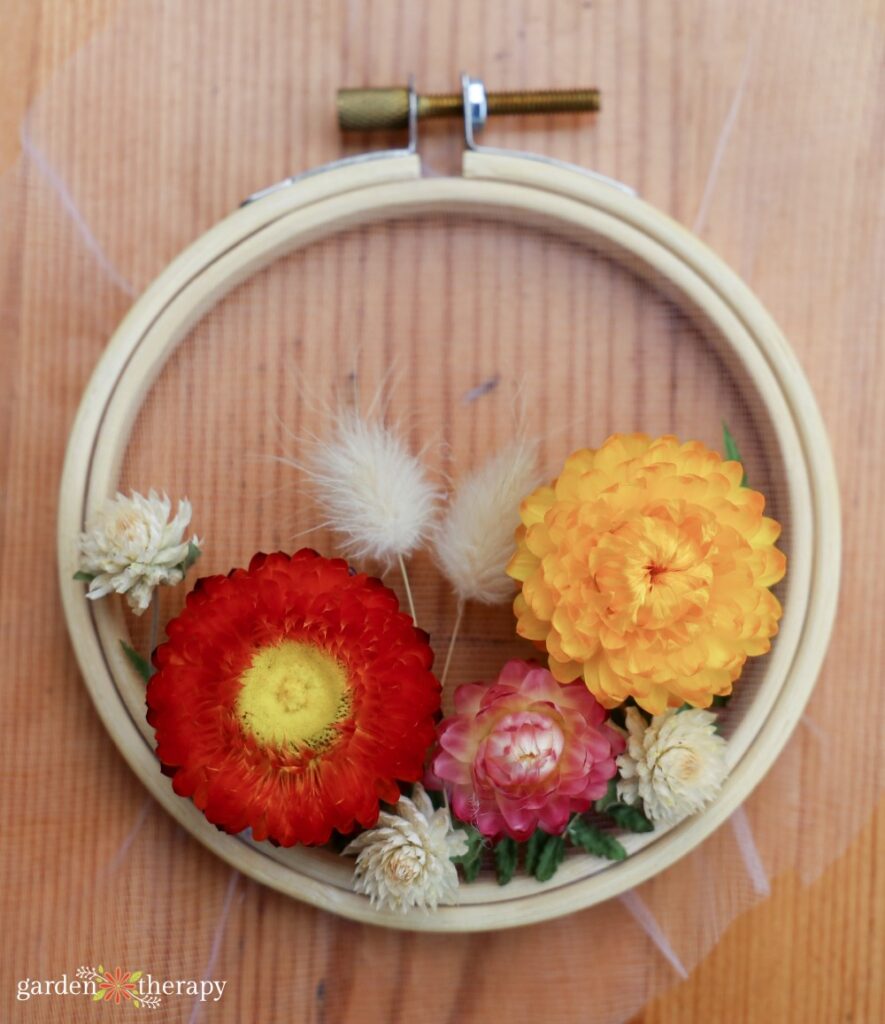
Add in your next layer of flowers. I usually like to incorporate my medium-sized and branching flowers at this point.
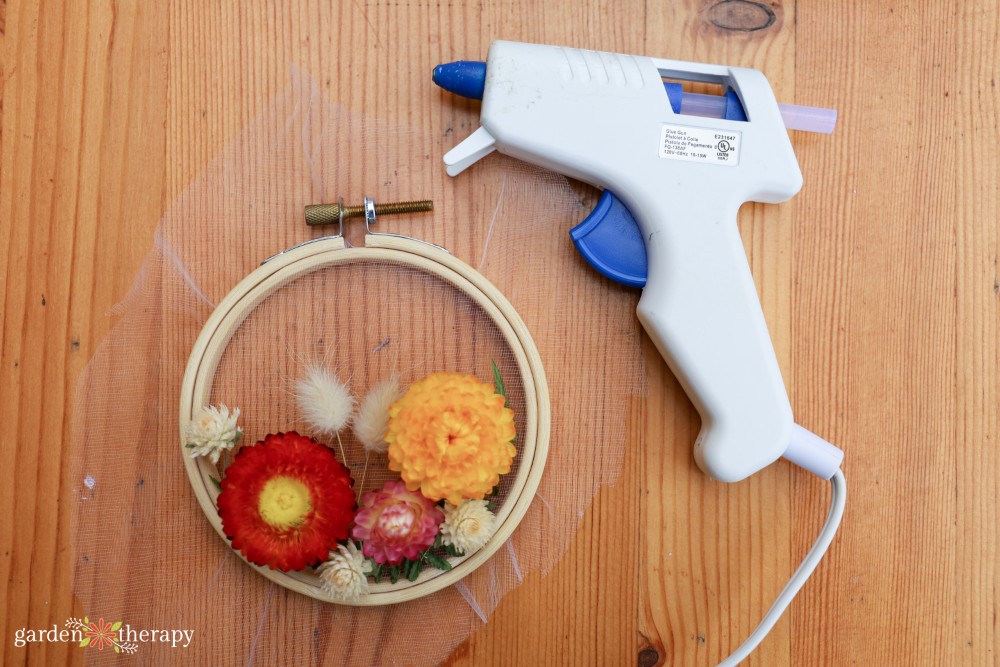
The last flowers I like to add are my larger flowers, which usually are my strawflowers. For these, I like to glue them in place, adding a large dollop to the back of the strawflowers and then holding it in place on the tulle for 30 seconds while the glue dries.
To finish up your dried flower art, trim the excess tulle. Use hot glue all around the back of the hoop over the ends of the tulle to help secure and hold it in place against the embroidery hoop.
You can also add some embroidery stitching. Again, you have to be extra careful about how the back of your stitching looks through the tulle.
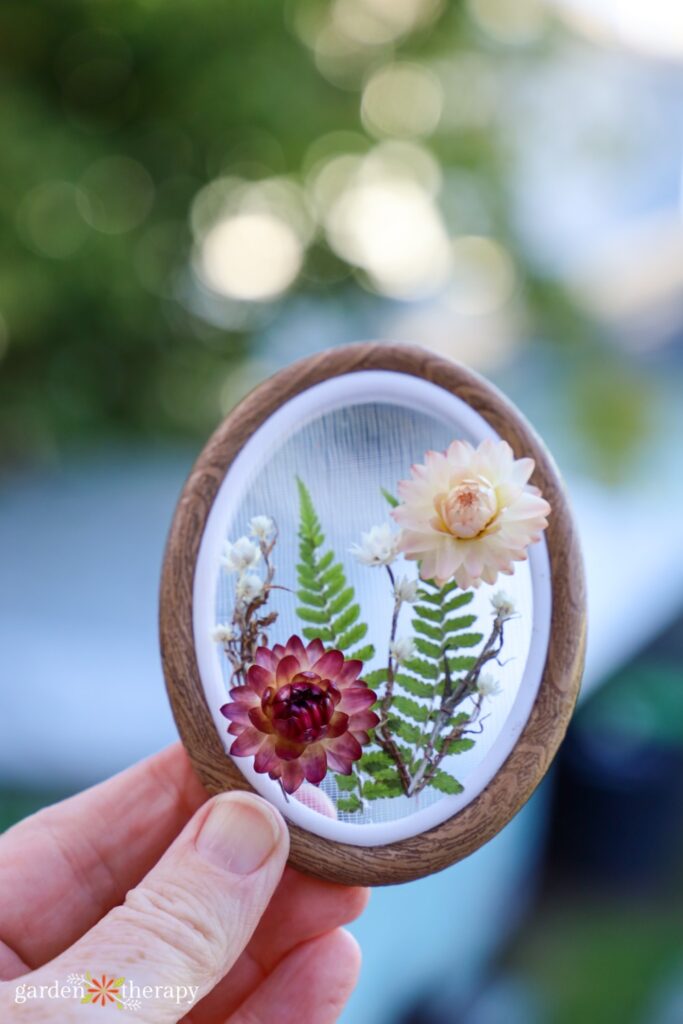
That’s it! These dried flower hoops make beautiful gifts and unique home décor. Hang it on the wall or in the window as a special, dried flower suncatcher.
More Dried Flower Art Ideas
From Vancouver, BC, Holly is Garden Therapy’s Content Manager. She has a BFA in Writing from the University of Victoria as well as a diploma in Floristry Design from Burnaby CCE. At home, she loves to grow cut flowers and dried flowers for her business, Dirty Daisy Florals, and is an avid houseplant collector and lover of bees. You can find her at @dirtydaisyflorals and @hollyheuversocial.